Saturday, January 29, 2011

Celebrating a wintery day

Whoa, we have had ALOT of snow in the great Northeast this winter. It all started on December 27 and it we’ve had an average of 2 storm storms a week since. And I don’t mean light flurries, dusty snow that you can simply sweep off the porch, oh no! Inches and feet of the white stuff. The week after holiday vacation, my daughter only had school one full day due to all the storms. And let’s not forget the ice storm that hit the afternoon after a morning of 6” of snow fell! Crunchy snow isn’t so fun. And since that we’ve had two more snow storms to add more on top of the slippery crunchiness. Icicles abound now as the temps have finally risen above 4 degrees and the ice on our roof is melting.

Now, I am not really complaining, really. Have I’ve been going a little nutty? Yup. Going a little stir-crazy? You betcha! But, we’ve had a ball outside playing when we can. When I start getting persnickety about the weather, I sew, play games with the kiddies or scrap. These things always make me smile.

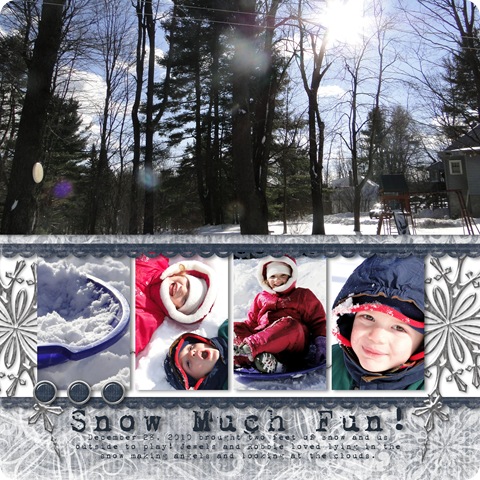
Here’s a bit of digital scrapping I did to remind me that snow isn't all that bad…

Snow pages 2010 - Page 052Snow pages 2010 - Page 053

These are shots I took in our yard the day after the big Christmas blizzard that literally stalled transportation and closed business & schools in the Northeast for days. Look at these photos. The pure joy in my kid’s faces is what is truly important.

You know what their favorite part of the day was? Lying in the winter snow lazily gazing up at the beautiful sky filled with white puffy clouds. It is the most still I think I’ve ever seen them.

Honest beauty.

Is the snow really that bad?

Not at all.

Friday, January 28, 2011

Tips & Tricks ~ February 2011

Here we are at block #2. And yup, I’m posting it EARLY! I know, you love me! How did you do with our January block? If it’s all done, be sure to post it in our photo album. More on that at the end…

Our second block is the Antique Tile. This was such a super fun and fast block to piece using strips. Please read thru the directions to the end first, and then start your block.

Ready……set……go!

Pick out your fabrics (remember, I am pulling from my scrap stash) – here is what I used:

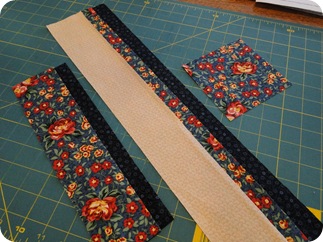
  • Light scrap – cut one 2 ½” x 19” strip
  • Medium scraps – cut one 2 ½” x 11” strip AND one 2 ½” x 19” strip AND one 4 ½” square
  • Dark scraps – one 2 ½” x 11” strip AND one 2 ½” x 19” strip.

Tips & Tricks Feb 2011

Cut to size…

Tips & Tricks Feb 2011

Traditionally, all of the pieces of this block are cut to size and pieced individually. Not only does that take a lot of time, accuracy may suffer because of all of the seam sewing starts & stops. TIP #1: We’ll be making this block using strip piecing. We’ll sew the strips together and then cut them into the segments we need to make the block. This will help the accuracy and reduce piecing errors. Cool huh?

First, let’s sew the dark and medium 11” strips together with the dark strip in the bottom position.
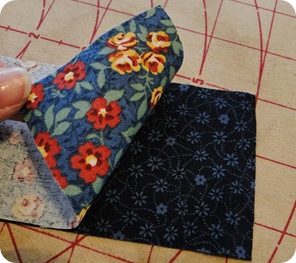
Tips & Tricks Feb 2011

TIP #2: Place the two strips right sides together and press. This will help the strips stay together and not shift while sewing.


Tips & Tricks Feb 2011

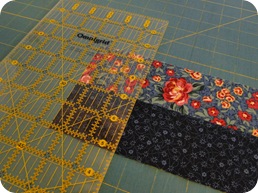
Press to the dark fabric. TIP #3: Measure across your strip set now. Does it measure 4 ½”? If not, your ¼” seam just isn’t right. Try again. My seam ripper and I are best buds! If you don’t get it right now, the whole block will be off. 
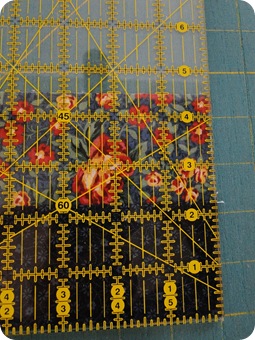
Tips & Tricks Feb 2011

Cross-cut into four 2 ½” segments.

Tips & Tricks Feb 2011   Tips & Tricks Feb 2011

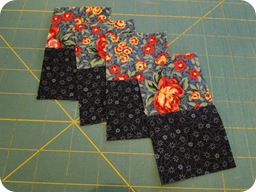
Next, we’ll chain sew these segments onto the 19” medium strip. Watch carefully, another tip is coming up! Lay the 19” medium strip right side UP on your sewing machine. Place a segment right side DOWN on it leading with the medium square Sew 1/4” seam and  - - - - - - > wait - - - - > 
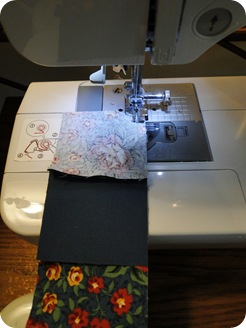
Tips & Tricks Feb 2011

- - - –> leaving the medium strip in your machine, place another segment right side DOWN onto it leading again with the medium square…see the photo below….leave a small space between segments. TIP #4: this kind of chain piecing makes for faster more accurate piecing, and saves on thread, too!
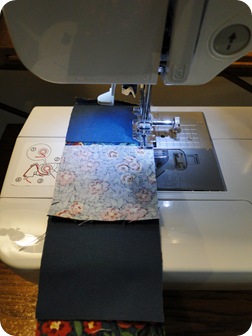
 Tips & Tricks Feb 2011

Repeat with the remaining 2 segments this time leading with the DARK square. So, 2 segments start with the medium square at the top and 2 stop with the dark square at the top. This is what it looks like just out of your machine:
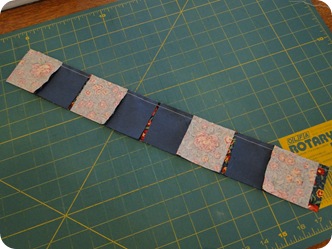
Tips & Tricks Feb 2011

Cut apart ensuring your unit are 4 1/2” wide.

Tips & Tricks Feb 2011

Press open with seams to the medium strip. These should measure 4 1/2” square. Set aside.

Tips & Tricks Feb 2011

Time to strip piece the other units of our block. Place the light and dark 19” strips rights sides together and as we did before, press them together before heading to your sewing machine to reduce the chance of shifting. These strips are long! Sew and press seam to the darker side. Cross cut into 4 1/2” segments.
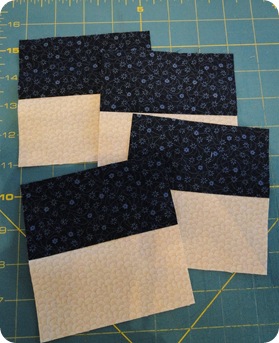
Tips & Tricks Feb 2011


Now layout your block! Doesn’t it look wonderful?

Tips & Tricks Feb 2011

Piece the block just like you would a traditional 9 patch block. I piece the rows first, pressing the seams opposite each other so they line up pretty and nice when I piece the rows together.

Here is my finished block – squared up to 12-1/2” unfinished.
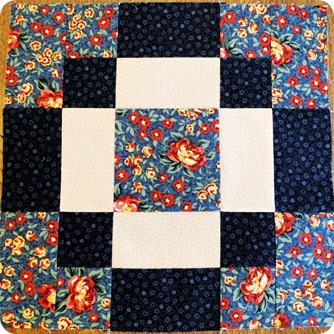
Tips & Tricks Feb 2011  

Yay – block #2 is done!!!  Can’t wait to see yours. Please post your blocks in the crickets studio blog flickr group and show off your blocks!

‘til next month,


©2011, Carrie Graziano, crickets studio

PDF file can be found HERE.

Thursday, January 27, 2011

Wednesday, January 26, 2011

Yup, another quilty quilt along mystery of sorts

It’s not really a quilt along.

It’s not a round robin.

It is based on rules we all made up, and techniques we wanted to try.

What is it?

It’s Dorinda’s 2011 Mystery!

And here is my first block in the mystery

Dorinda block #1

And no two quilts will be alike as everyone involved is making up the rules and challenging each other.

Check out the Dorinda’s 2011 Mystery blog and here’s my first block post….read it. It’s kinda funny {grin}.

Tuesday, January 25, 2011

Quilt Alongs Update

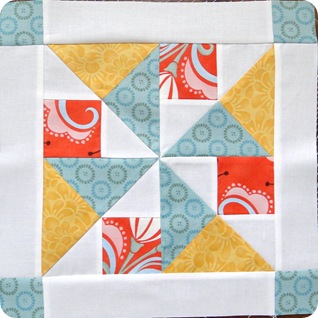
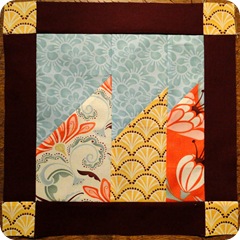
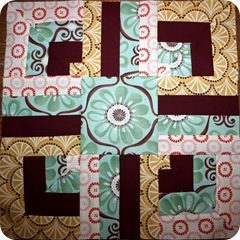
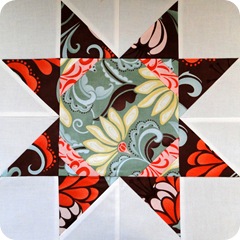
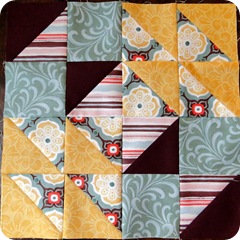
Yay – block 7 of the Layer Cake Quilt Along with Moose on the Porch Quilts is done! This one is designed by Celine Perkins from Perkins Dry Goods. Check out her blog here. Just finished it moments ago.

Layer Cake Quilt Along Block 7

The more I look at it, the more I like it. The orangey fabric stands out a little more than I’d like, but that’s okay. Once it gets into the quilt top with the other blocks, it’ll be hunky dory. Still using Fandango by Kate Spain for Moda.

And, I started another quilt along today (I know, I am so addicted to them). This one is the Blogger’s Blockapalooza 2011 over at Quilt Dad. This is a super fast paced quilt along and I only hope i can keep up! Two 12” blocks a week – yup, TWO! Can you stand it????

Here is the first block designed by Quilt Dad himself John Cary.

Blockapalooza 2011 Block 1


I’m using Park Avenue by 3 Sisters for Moda. I had a fat eighth bundle so I dug right into it this morning. Super fun block to put together! I’ll most likely need to add some Moda Bella solids as we go along…still trying to figure out which ones will coordinate the best. Any thoughts?

Working on some scrapbooking stuff today, too– cool 20% off sale at Creative Memories only until Jan 31st. Get 20% off any size or color album coversets, pages and page protectors. Even 20% off hardcover digital storybooks! They’ve never ever done a sale this huge. Pop over here to check it out. I am so stocking up!

Laundry is a’calling me so I’d better put my ole’ homemaker hat back on. Will be playing with fabric scraps a little later tonight after naps, homework, grocery shopping, laundry and bedtime…thinking about working up the blockapalooza block above in a scrappy version. Pop back to see if I get it done {wink}.

Monday, January 24, 2011

It’s up – wow!

Yup, my border design for the Patchwork Posse Round Robin has been posted on Becky’s blog – yippee!!! Check it out here.

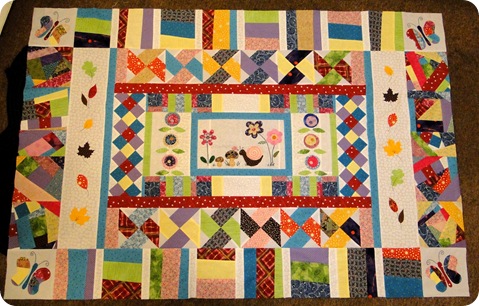
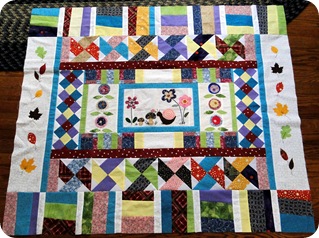
And here is my quilt top with MY side border design (look on the right & left outer sides) -

Patchwork Posse Round Robin Border #7

Sew, you like?

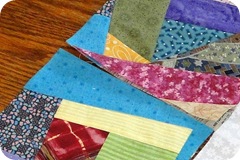
The butterflies were for my daughter and are cut from “crazy patches” as I call them. I tho’t they tied into the center design pretty nicely. The crazy patching was oodles of fun, too. A solid border was really needed here, and it also need to be able to be adjusted to fit everyone’s tops as they can get pretty varied as the borders are added.

And my favorite part? I got to use up TONS and TONS of scraps and pieces of trimmed blocks I made when adding the other 6 borders! Waste not want not, right?

This border is also adaptable to any project. It could be an accent on an apron, pillow….lots of quilty things.

I love this quilt top – looking at it makes me all melty. I see fabrics from my kids baby quilts, holiday stockings I’ve made for family, the leaves were added to remind me of my daughter's penchant for leaf collecting last fall….such a keepsake. It’ll hang in my children’s room when it’s completed.

Saturday, January 22, 2011

Birthday giveaway….

Nope, not my birthday, but a fellow fun blogger! KarrieLyne over at Freckled Whimsy is celebrating a year of her blog. She has three awesome giveaways, but you have to act fast! Click here to go right to the giveaway post.

Freckled Whim header

KarrieLyne always has really wonderful tips and very cool projects. Her blog is absolutely worth a look! Pop back here an let me know what you think!

Thursday, January 20, 2011

Costumes?

Really? Yup, if you daughter is in an elementary school Lip Sync concert that is.

My sweetie and two of her girlfriends are lip syncing and dancing to Cupid’s Shuffle on Friday night (hopefully the snowstorm won’t delay it) at her school. It’s such a BIG DEAL and altho’ she’s only in first grade, you’d think it was the most important thing EV-ER.

So, as the ‘parent in charge’ of this dynamic group, I talked to the girls about their costumes.

So I asked, “What colors do you girls like?”

“Black and white,” said in unison. (Ah, they talked about this ahead of time….)

“Okay,” I say, “Black and white is very good. How about a color?”

B. chimes in, “No pink. We just don’t like pink ANYMORE!” S. concurs, “Yeah, no pink. Nobody likes pink.” My daughter softly adds, “I don’t like pink {since when?} but purple is my favorite color…”

B. and S. respond enthusiastically, “We LUUUVVV purple. Purple rocks. It is so cool!”

“Oh, and it has to sparkle. We just LUUUVVV sparkles!” Heads nodding all around.

Got it. Black and white outfits. Purple is the accent color. It has to sparkle. Who knew three first graders could be so definitive? The rest of the discussion went pretty much the same way and we ended up agreeing on decorated white t-shirts, poufy black skirts and black leggings. Oh, and they all have to SPARKLE.

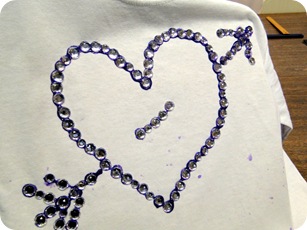
Here are the t-shirts. I had the girls decorate the fronts the other day:
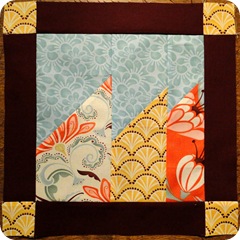
Lip Sync ShirtsHard to tell in the pic, but the rhinestones are stuck on with purple shimmer fabric paint. I did embellish the collar and sleeves with the same shimmer paint.

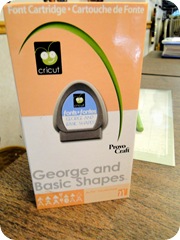
And one of the other moms gave me this cool easy idea…take this:

Lip Sync Shirts

and this:

Lip Sync Shirts

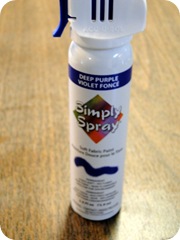
and a can of this:

Lip Sync Shirts

and do this:

Lip Sync Shirts

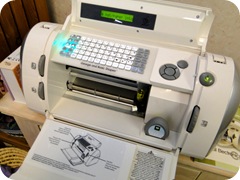
(Use your Cricut to cut out heavy cardstock letters. Place them on your prewashed shirt with no softener BTW and spray lightly with spray-on fabric paint. Remove the cardstock letters.)

Lip Sync Shirts

I added more rhinestones for sparkle and viola! Personalized shirts for the concert. And they are SPARKLY all over!

I’ll post a picture of the completed ensemble soon. It’s going to be too adorable!

Wednesday, January 19, 2011

Getting dizzy going round and round

Not really! The Patchwork Posse Round Robin is going great, and I recently finished up the sixth border set.

Here is my quilt top:

Patchwork Posse Border #6

See the new top and bottom borders? Wonky striped blocks – too cool and super super easy. I got them on lickety-split (it just took me a few days to post this). Beth from EvaPaige Quilt Designs made up this round and I love it! Check out her BLOG and her WEBSITE. You’ll like what you see!

My borders debut on January 24th – that’s next Monday, my mom’s birthday. How neat. Check back to see what I’ve come up with – these borders are adaptable to most any quilt top.

Tuesday, January 18, 2011

Best laid plans

Well, I made this block for the January Block Lotto. We are doing Bright Stacks.

Block Lotto Jan 2011


And I actually made a second block, and well, decided to keep it. Well, not really. My brother’s step-children need (yup, need) quilts from their Aunt Carrie, and I’m thinking that a “bright stacks” quilt would be perfect for a little girl. (I also make matching Christmas stockings for my nieces and nephews, sooo….I think I have enough fabric for that too..better go check.

Only one block to enter for Block Lotto this month. The inspiration just hit me, and bam! An idea for little Dianna’s quilt was born!

Saturday, January 15, 2011

Block 6 done!

Woo hoo – half way done with the Layer Cake Quilt Along over at Moose on the Porch Quilts. Here is my block:

Layer Cake Quilt Along Block 6

I am using Fandango by Moda, and am finding it a wee bit challenging. Don't get me wrong – the fabrics are amazingly gorgeous! But the fat quarter pack I am using is chock full of prints, large, small, medium and busy! For some “quieter” fabrics, I got some Kona solids and that has helped quite a bit, but still – finding balance within each block is tough for me.

Maybe it’s working with the modern type collections? I dunno, but it’s been fun trying!

So, here are all of my blocks to date (I apologize for the icky photography):

Layer Cake Quilt Along Block 1  Layer Cake Quilt Along Block 5Layer Cake Quilt Along Block 4Layer Cake Quilt AlongLayer Cake Quilt Along Block 3 Layer Cake Quilt Along Block 6

Whaddya think?

Thursday, January 13, 2011

Sneaky me

Here’s a quick sneaky peak at my round in the Patchwork Posse Round Robin. My borders, #7 in the round, debut on January 24th, but just for you….here is a little bit to whet your appetite….

Patchwork Posse Round Robin Border #7

That’s all I can give ya. Check over to the round robin on the 24th for more…

Related Posts Plugin for WordPress, Blogger...