Wednesday, September 21, 2011

Yummy fabric

Fat Quarter Stars QAL

Just opened a fat quarter pack of Origins by Basic Grey for Moda. I’ve had it in my stash for a while (got it at an absolutely incredible sale). Konda over at Moose on the Porch Quilts asked me to be a designer in her new Fat Quarter Starts Quilt Along, and I just knew I had to break into this fat quarter pack for it!

Sew today, I am working on my block for the QAL…shhhh, it’s a well-kept secret, considering I haven’t even sewn it up yet – ha! My block is the 2nd block in the QAL and is scheduled to come out October 11. The quilt along starts on September 27 and new blocks are introduced every other week. Plus, there will be PRIZES!

After I make up my QAL block, I have to get back to job hunting and packing for my daughter’s weekend camping trip with the girl scouts. Last year’s camping trip was really wonderful. This year the forecast is for rain, but I’m sure we’ll still really enjoy ourselves.

What are you doing this weekend? Sewing? Scrapbooking? Playing with the family? Whatever it is, I hope you put yourself completely into it and have a super fun time!clip_image001

Thursday, September 15, 2011

Tips & Tricks ~ September 2011 BONUS Block

Surprise! Here’s a 6” finished bonus block for you! Every quilt needs a label, and I thought this Signature Block fit the bill perfectly. You can use it in the front of your quilt top, or as a label on the back. Let’s wait until we have all the blocks done and see what happens.

I found this signature block on quilterscache.com and adapted the directions – I am so not a template quilter, so I changed it up a bit. Since this is a bonus block, I won’t have as detailed instructions nor as many tips…we’ll have fun with this simple block!

Pick out your fabrics:

Pick two of your fave fabrics for the squares and a light solid for your “signature” part.

clip_image002

Favorite fabric squares: 2 each 5-1/4” squares, each one a different color.

Signature fabric (here I used the muslin): 1 each 4” x 11” strip

Let’s sew! Stack the two 5-1/4” squares and cut once diagonally from each corner to corner to make four quarter square triangles (QST). You’ll only need two of each for this block so save the others for another block or project.

Sew the QSTs right sides together in pairs using a scant 14” seam. Press to the darker side. See below for placement, make two the same. (please ignore the muslin in the photo….)

clip_image004

Fold the signature fabric strip in half long ways, open up, and line up the seam of one triangle unit with the fold…

clip_image006

Flip right sides together and sew a 1/4” seam. Press open with seams to the triangle unit.

clip_image008

Repeat for the other side…

clip_image010

clip_image012

Now we need to trim up the block to 6-1/2” unfinished. Use a square cutting ruler for this. Lay your ruler on the square lining up the bottom and left edges of the triangles units with the 6-3/4” markings. 

clip_image014

clip_image016

Trim the right and top edges. Pick up the ruler, turn the block 180 degrees and repeat, instead this time line up the bottom and left edges with the 6-1/2” markings. Trim the top and right edges even with the ruler.

clip_image018

clip_image020

Viola! You are done!

clip_image022

Remember to post your block in our group photo album! Enjoy your September BONUS!

clip_image023

©2011, Carrie Graziano, crickets studio

Thursday, September 1, 2011

Tips & Tricks ~ September 2011

Whew! Wasn’t sure I’d get this T&T post typed up! August was a busy month, and adding Tropical Storm Irene to the mix last weekend, well, all of a sudden August was over. I actually finished sewing this block during the tropical storm – used it as an excuse to take my mind off of what may happen. Of course, I remembered to take photos, you’ll note they are a little wonky as the lighting in the house wasn’t great that day, but I so totally thought I’d already typed the directions. Surprise! I forgot to do that one small step {sheepish grin}.

We’re doing the block Louisiana this month. I found it on quilterscache.com and adapted the directions a bit.

Pick out your fabrics:

I used my stash again, and wasn’t completely thrilled with the end result, but hey, it’s going in a sampler quilt, right? I am confident these colors and their combination will work out fine. TIP #1: Sometimes you just have to say, “what the heck” and roll with it.

Tips & Tricks September 2011

Small pinwheel fabric: 4 each 3-1/2” squares

Large pinwheel fabric: 4 each 3-1/2” x 6-1/2” rectangles

Background (here I used the muslin): 4 each 3-1/2” x 6-1/2” rectangles AND 4 each 3-1/2" squares

TIP #2: Aim for contrast not only in color, but also in scale. See how the background is a solid, the small pinwheel fabric is a marble (much like a small print) and the large pinwheel fabric is a large print. Say I were to use all large scale prints for this block – they’d fight each other and the block pattern wouldn’t stand out well at all.

Tips & Tricks September 2011

This is another quick block. Take out your squares, all 8 of them. On the back of the squares, mark a diagonal line from corner to corner.

Tips & Tricks Block September

Place the background square on the left side of the large pinwheel rectangle…

Tips & Tricks Block September

and sew 1/4” away from that line. TIP #3: And another repeat of the same ole’ tip…sew a second line 5/8” away from your first seam. This will result in an extra HST and not wasting the “unwanted” corners in the sew and flip method

Tips & Tricks Block September

Cut apart 1/4” away from the drawn line. Set the extra HST aside (we’ll use it in the final quilt top layout or maybe even a bonus block along the way).

Tips & Tricks Block September

Press open the corner...

Tips & Tricks Block September

Now place a small pinwheel square on the opposite corner of the light square noting that the guideline is now opposite the first square. Repeat what we just did above…

Tips & Tricks Block September

 Tips & Tricks Block September

Cut apart 1/4” along the drawn line, set the extra HST aside and press the corner open.Tips & Tricks Block September

Tips & Tricks Block September

Make 4 of these flying geese units and press well.

Next, take a background rectangle and a flying geese unit, layout and sew as shown. Wait! Don’t sew yet until you read Tip #4…

Tips & Tricks Block September

TIP #4: When sewing these together, sew with the flying geese unit on top so that you can see the stitching lines…you’ll want to sew your seam so it’s not only 1/4”, but also so it falls just a stitch width ABOVE the “X” formed by the previous seams…see my close-up below:

Tips & Tricks Block September

If you do this, you’ll end up with a nice sharp point like this…

Tips & Tricks Block September  

Make 4 of these unit and then layout your block. See? It’s a simple 4 patch to piece together now. Easy peasy, with one more tip before you sew….read on….

Tips & Tricks Block September

TIP #5: When placing these units rights sides together to sew your 1/4” seam, take time to match the seams as I have below. When you do this, your pinwheel center comes out perfectly. Also remember to sew one stitch width away from any “X” stitching to ensure sharp points.

Tips & Tricks Block September


And here’s my completed block

Tips & Tricks Block September

Don’t forget to post your block in our group photo album! Enjoy your September and back to school and apple picking season. I’ll be back soon with a BONUS block for you. Thanks for sewing with me!clip_image001

©2011, Carrie Graziano, crickets studio

Wednesday, August 31, 2011

Late

That’s me, late. With the Tips & Tricks block for September that is.

I have the block all sewn.

Pictures are taken, not cropped.

But no words are written and it’s getting super late (there’s that word again) on 8/31.

The September bonus block is even sewn…nope, nothing written about that one yet either.

Forgive me, it’ll be up soon {please please}

clip_image001

Monday, August 29, 2011

Lucky

It’s the morning after the remnants of Hurricane Irene passed thru our area (Albany, NY). It came thru as a tropical storm and wow, did it rain here! Lots of wind, too. It started Saturday nite and last thru the wee hours of this morning. The small town of East Greenbush that we live in was spared the worst, thank goodness. We had a couple leaks in our home and a semi-flooded basement, but that’s it. Many we know had mudslides, massive flooding, trees down in their yards, on their homes. 140,000 here in NY are without power, many roads are closed. My DH just called and said he’s turning around because 1. He can’t get to work with the road closures and 2. His partner just called him and said the office is powerless! We are blessed and feel so lucky that we were spared the worst.

Let me tell you how scared we were…as we prepared driving around our town Saturday, it was eerie to see windows taped and boarded up, shelves depleted of batteries, water, canned goods….these types of storms just don’t happen here.

Kmart before Irene hit

Last time we had a major event like this was in July 2008 and it was a fluke storm that downed three trees in our yard. That one started and finished in less than 5 minutes.

Storm damage 

So, as I count my many blessings this morning, I’ll be sewing a bit and hugging my kids and DH (our 18th wedding anniversary was also yesterday!)

Carrie and Sal Wedding

Posting this hoping you all and your loved ones are safe and healthy today. If you are cleaning up, I am sending wishes that it goes quickly for you and that life returns to normal very soon.

clip_image001

Monday, August 22, 2011

Potty training, Back-to-school and In-Laws visiting ~ oh my!

All at once, life has interrupted life….what?

Seems like everything is happening at once these past few weeks – it’s all GOOD, but super BUSY!

Love seeing my in-laws. They are wonderful people, and I’ve been so looking forward to hugging them. Their month-long visit from Florida is a welcome change to our summer.

It’s a task I’d rather not do, but I need to now sort thru the huge pile of my daughter’s 1st grade papers to make room for 2nd grade. Less than 2 weeks away is the start of our school year, and I so need to get organized for it. Have to also clean off the kitchen table so the kids can eat their breakfast in there away from the distraction of TV and toys. Our youngest also starts preschool. September 6th is going to be a tough day for this mom.

And then there’s the potty training. My son decided on his own to tell this unprepared mom that the diaper fairy came and took his diapers to the new babies. He had to learn to use the potty. We’re into day #13 and actually doing well, both of us. I’ve held my patience in check and he and I are both better for it!

In all of this I am trying to work on a bonus block for August {grin} and the September T&T block…have some ideas, just have to get moving on them.

Back to life…think I can fit a shower in today?

clip_image001

Monday, August 1, 2011

Tips & Tricks ~ August 2011 repost!

Edited 9/1/11: Blogger did it again, grrr….it ate up my post for the August T&T block! Doing a very quick repost now and will fix the photos soon. Check the PDF file under the Tips & Tricks tab to print these out….

It’s August! We’re midway through summer – whew! We’re just back literally, hours back, from our two week vacation to the beach. What a fantastic time we experienced! Hope you’re enjoying time with your family, too, whether home, away or something in between.

A new month brings a new block in our quilt along. For August, let’s do a Brilliant Star. I just love LOVE star blocks and this is near the tippiest toppest of my list! The star is meant to glow from the center out and radiate brilliance, so color placement is important.

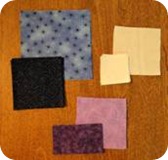
Pick out your fabrics:

Pulling from my stash again, I found some plain muslin, and blues and purples I just had to use.

Here we go…

Light Blue: 4 each – 5” x 5” squares

Dark Blue: 8 each 3-1/2” squares

Light Purple: 4 each 3-1/2” squares

Dark Purple: 4 each 2” x 3-1/2” rectangles

Lightest (here I used the muslin): 1 each – 3-1/2”  square AND 8 each - 2” squares
clip_image002

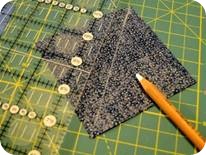
This block pieces together SO FAST! Yay – more time to get out into the sunshine this month {big toothy grin}. Take out your blue fabrics, both light and dark. On the back of the dark squares, mark a diagonal line from corner to corner. TIP #1: I use a chalk pencil to mark the back of dark fabrics. Lead pencils just don’t show up very well unless it’s a light fabric.
 clip_image004

Place the dark square in the corner of the larger light blue square… clip_image006

and sew 1/4” away from that line on either side. TIP #2: Another repeat of the same ole’ tip…sew a second line 5/8” away from your first seam. This will result in an extra HST and not wasting the “unwanted” corners in the sew and flip method clip_image008

Cut apart 1/4” away from the drawn line. Set the extra HST aside (we’ll use it in the final quilt top layout). clip_image010

Press open the corner... clip_image012

Place another 3-1/2” square on the opposite corner of the light square and repeat what we just did above… clip_image014

clip_image020

  Cut apart 1/4” along the drawn line, set the extra HST aside and press the corner open. clip_image018

clip_image016

Make 4 of these units and press well. Square to 5”. Set aside and let’s work on the purple units.

Pull out your light purple squares and the muslin 2” squares. Using a lead pencil, mark from corner to corner on the back of all 8 muslin squares. TIP #3: Use a mechanical lead pencil and you’ll always have a fine pencil line and not need to stop to sharpen it! clip_image022

Okay, remember what we just did above? Sew…let’s repeat it with a couple of easy adjustments. First, these units are smaller than the blue ones. Therefore, no extra HST unless you are really a glutton for punishment {hee hee}. Sew, place a muslin square on the corner of the purple square…and sew on the drawn line. clip_image026

clip_image024

Trim 1/4” away from that line… and press open. clip_image030

clip_image028

Now, here is the where the other adjustment comes in…place the next muslin square on the corner BELOW the one we just did. clip_image032

Proceed as we did earlier making 4 units. Square up to 3 1/2”. clip_image036

clip_image034 

Sew the purple rectangle now to the 3 1/2” unit. See the photo for placement. clip_image038

And press open toward the darker fabric.

Let’s layout your block and piece together. First in rows and then the rows to each other. clip_image040

And here’s my completed block clip_image042

Don’t forget to post your block in our group photo album! Enjoy your August and eek – it’s almost back to school time! Enjoy this last month of summer break!

clip_image043

©2011, Carrie Graziano, crickets studio

Related Posts Plugin for WordPress, Blogger...