Wednesday, September 21, 2011

Yummy fabric

Fat Quarter Stars QAL

Just opened a fat quarter pack of Origins by Basic Grey for Moda. I’ve had it in my stash for a while (got it at an absolutely incredible sale). Konda over at Moose on the Porch Quilts asked me to be a designer in her new Fat Quarter Starts Quilt Along, and I just knew I had to break into this fat quarter pack for it!

Sew today, I am working on my block for the QAL…shhhh, it’s a well-kept secret, considering I haven’t even sewn it up yet – ha! My block is the 2nd block in the QAL and is scheduled to come out October 11. The quilt along starts on September 27 and new blocks are introduced every other week. Plus, there will be PRIZES!

After I make up my QAL block, I have to get back to job hunting and packing for my daughter’s weekend camping trip with the girl scouts. Last year’s camping trip was really wonderful. This year the forecast is for rain, but I’m sure we’ll still really enjoy ourselves.

What are you doing this weekend? Sewing? Scrapbooking? Playing with the family? Whatever it is, I hope you put yourself completely into it and have a super fun time!clip_image001

Thursday, September 15, 2011

Tips & Tricks ~ September 2011 BONUS Block

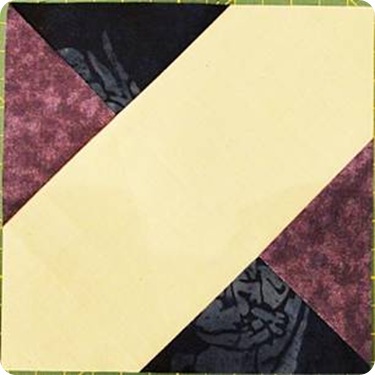
Surprise! Here’s a 6” finished bonus block for you! Every quilt needs a label, and I thought this Signature Block fit the bill perfectly. You can use it in the front of your quilt top, or as a label on the back. Let’s wait until we have all the blocks done and see what happens.

I found this signature block on quilterscache.com and adapted the directions – I am so not a template quilter, so I changed it up a bit. Since this is a bonus block, I won’t have as detailed instructions nor as many tips…we’ll have fun with this simple block!

Pick out your fabrics:

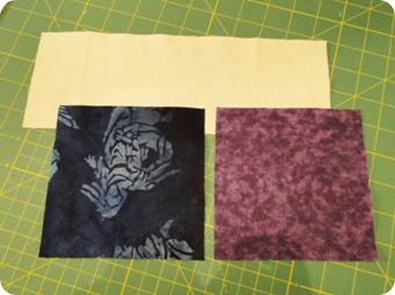
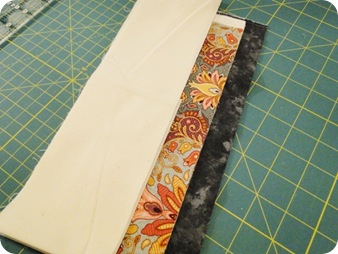
Pick two of your fave fabrics for the squares and a light solid for your “signature” part.

clip_image002

Favorite fabric squares: 2 each 5-1/4” squares, each one a different color.

Signature fabric (here I used the muslin): 1 each 4” x 11” strip

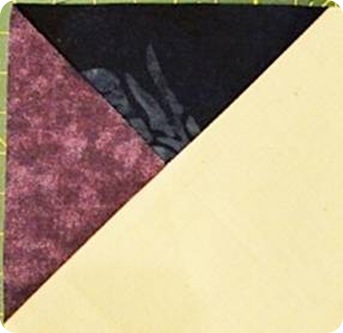
Let’s sew! Stack the two 5-1/4” squares and cut once diagonally from each corner to corner to make four quarter square triangles (QST). You’ll only need two of each for this block so save the others for another block or project.

Sew the QSTs right sides together in pairs using a scant 14” seam. Press to the darker side. See below for placement, make two the same. (please ignore the muslin in the photo….)

clip_image004

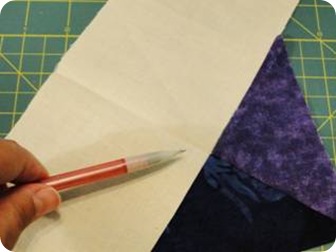
Fold the signature fabric strip in half long ways, open up, and line up the seam of one triangle unit with the fold…

clip_image006

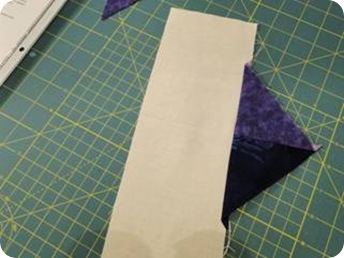
Flip right sides together and sew a 1/4” seam. Press open with seams to the triangle unit.

clip_image008

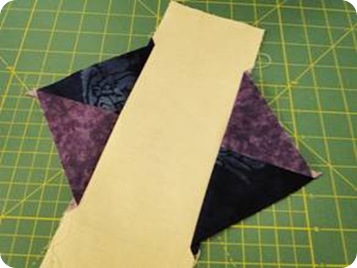
Repeat for the other side…

clip_image010

clip_image012

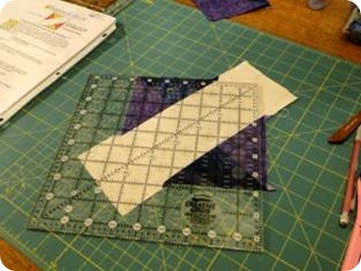
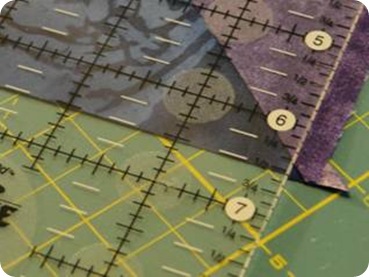
Now we need to trim up the block to 6-1/2” unfinished. Use a square cutting ruler for this. Lay your ruler on the square lining up the bottom and left edges of the triangles units with the 6-3/4” markings. 

clip_image014

clip_image016

Trim the right and top edges. Pick up the ruler, turn the block 180 degrees and repeat, instead this time line up the bottom and left edges with the 6-1/2” markings. Trim the top and right edges even with the ruler.

clip_image018

clip_image020

Viola! You are done!

clip_image022

Remember to post your block in our group photo album! Enjoy your September BONUS!

clip_image023

©2011, Carrie Graziano, crickets studio

Thursday, September 1, 2011

Tips & Tricks ~ September 2011

Whew! Wasn’t sure I’d get this T&T post typed up! August was a busy month, and adding Tropical Storm Irene to the mix last weekend, well, all of a sudden August was over. I actually finished sewing this block during the tropical storm – used it as an excuse to take my mind off of what may happen. Of course, I remembered to take photos, you’ll note they are a little wonky as the lighting in the house wasn’t great that day, but I so totally thought I’d already typed the directions. Surprise! I forgot to do that one small step {sheepish grin}.

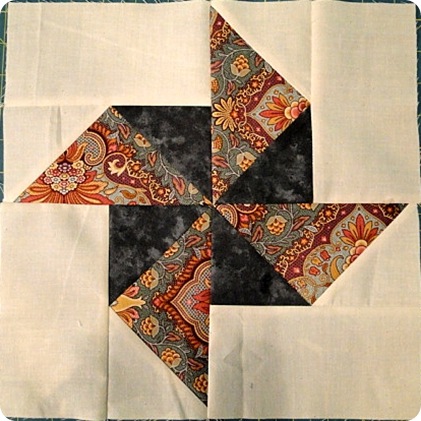
We’re doing the block Louisiana this month. I found it on quilterscache.com and adapted the directions a bit.

Pick out your fabrics:

I used my stash again, and wasn’t completely thrilled with the end result, but hey, it’s going in a sampler quilt, right? I am confident these colors and their combination will work out fine. TIP #1: Sometimes you just have to say, “what the heck” and roll with it.
Tips & Tricks September 2011

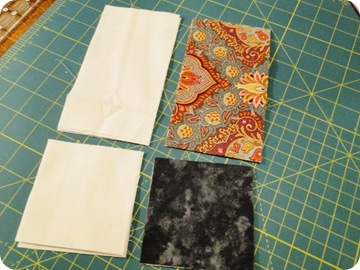
Small pinwheel fabric: 4 each 3-1/2” squares

Large pinwheel fabric: 4 each 3-1/2” x 6-1/2” rectangles

Background (here I used the muslin): 4 each 3-1/2” x 6-1/2” rectangles AND 4 each 3-1/2" squares

TIP #2: Aim for contrast not only in color, but also in scale. See how the background is a solid, the small pinwheel fabric is a marble (much like a small print) and the large pinwheel fabric is a large print. Say I were to use all large scale prints for this block – they’d fight each other and the block pattern wouldn’t stand out well at all.
Tips & Tricks September 2011

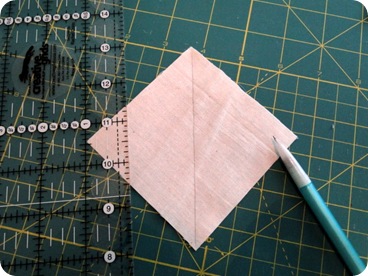
This is another quick block. Take out your squares, all 8 of them. On the back of the squares, mark a diagonal line from corner to corner.
Tips & Tricks Block September

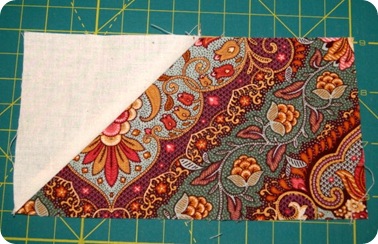
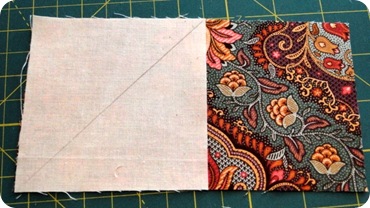
Place the background square on the left side of the large pinwheel rectangle…
Tips & Tricks Block September

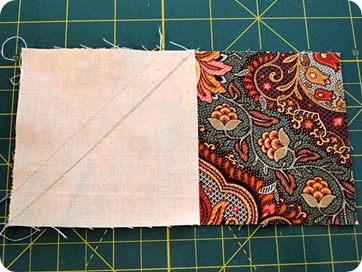
and sew 1/4” away from that line. TIP #3: And another repeat of the same ole’ tip…sew a second line 5/8” away from your first seam. This will result in an extra HST and not wasting the “unwanted” corners in the sew and flip method
Tips & Tricks Block September

Cut apart 1/4” away from the drawn line. Set the extra HST aside (we’ll use it in the final quilt top layout or maybe even a bonus block along the way).
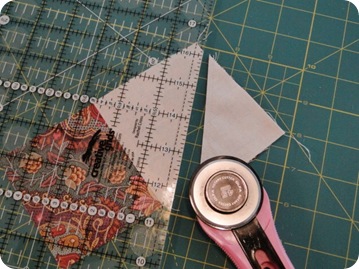
Tips & Tricks Block September

Press open the corner...

Tips & Tricks Block September

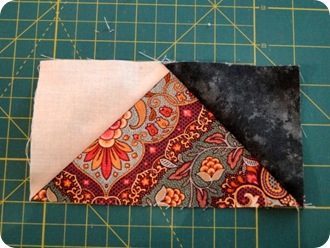
Now place a small pinwheel square on the opposite corner of the light square noting that the guideline is now opposite the first square. Repeat what we just did above…

Tips & Tricks Block September

 Tips & Tricks Block September

Cut apart 1/4” along the drawn line, set the extra HST aside and press the corner open.Tips & Tricks Block September

Tips & Tricks Block September

Make 4 of these flying geese units and press well.

Next, take a background rectangle and a flying geese unit, layout and sew as shown. Wait! Don’t sew yet until you read Tip #4…

Tips & Tricks Block September

TIP #4: When sewing these together, sew with the flying geese unit on top so that you can see the stitching lines…you’ll want to sew your seam so it’s not only 1/4”, but also so it falls just a stitch width ABOVE the “X” formed by the previous seams…see my close-up below:
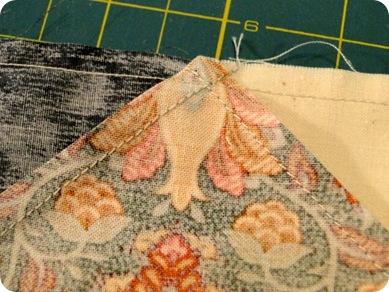
Tips & Tricks Block September

If you do this, you’ll end up with a nice sharp point like this…
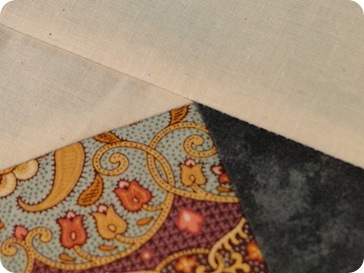
Tips & Tricks Block September  

Make 4 of these unit and then layout your block. See? It’s a simple 4 patch to piece together now. Easy peasy, with one more tip before you sew….read on….

Tips & Tricks Block September

TIP #5: When placing these units rights sides together to sew your 1/4” seam, take time to match the seams as I have below. When you do this, your pinwheel center comes out perfectly. Also remember to sew one stitch width away from any “X” stitching to ensure sharp points.
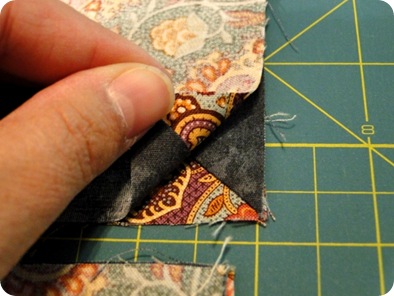
Tips & Tricks Block September


And here’s my completed block

Tips & Tricks Block September

Don’t forget to post your block in our group photo album! Enjoy your September and back to school and apple picking season. I’ll be back soon with a BONUS block for you. Thanks for sewing with me!clip_image001

©2011, Carrie Graziano, crickets studio

Related Posts Plugin for WordPress, Blogger...